Making a Regency Bonnet
Always looking for new dress-up opportunities, I contacted JASNA to see what Atlanta-area events might require head-to-toe Regency finery. Turns out local Jane Austen fans are (I suppose understandably) more about the author's stories than her clothes.
Despite my potentially offensive insistence that there's no point having a Jane Austen get-together without dressing the part, they were kind enough to invite me to their "Box Hill Picnic." The group was reading Emma, and the picnic on Box Hill is the story's pivotal scene. Here's the 2009 film version:

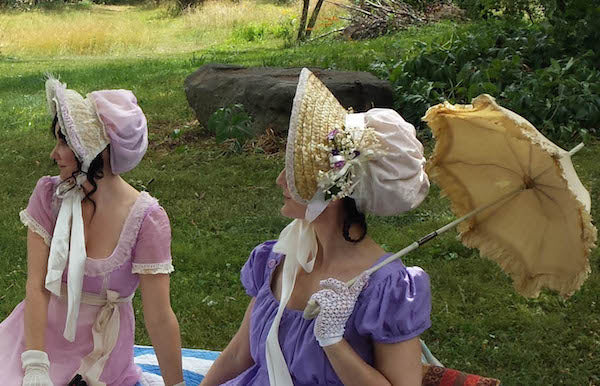
Yummy! And reason enough to cobble together an entire Regency outfit, no? Sarah (at left in cover photo) was game as always despite her strong preference for the Brontës.
We came up with dresses (mine custom by Fashions from the Past, Sarah's a 60s formal transformed with her customary creativity and skill). Of course we needed bonnets, too, and thought it might be fun to create our own.
We followed this YouTube tutorial. I really like the presenter's* pleasant manner and non-judgmental approach ("Don't want to sew? Use a glue gun!").
Here's how it went --
First, I found an 18" wide straw hat for $3 (about as much as I was willing to risk) at a gift shop. Sarah found a slightly smaller, airier model for the same price at a thrift store. They're available at your big-box craft store, as well.
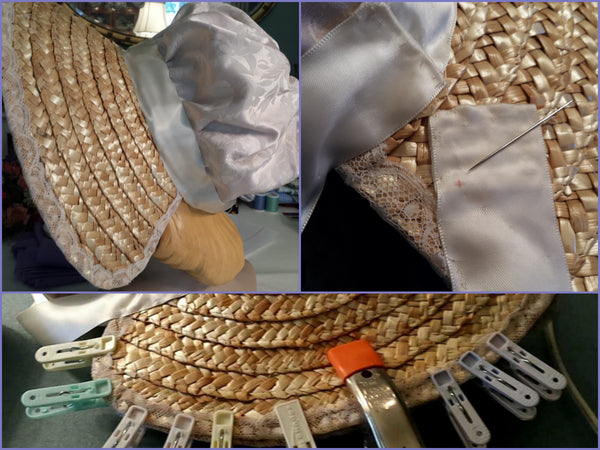
I folded the hat and cut it not-quite-in-half (I'd be using the bigger piece), trimmed the pointed edges into curves, then encased the perimeter in lace to prevent unraveling and give it a tidy finish. Sarah used ribbon for this step. The tutorial suggests folded bias tape.

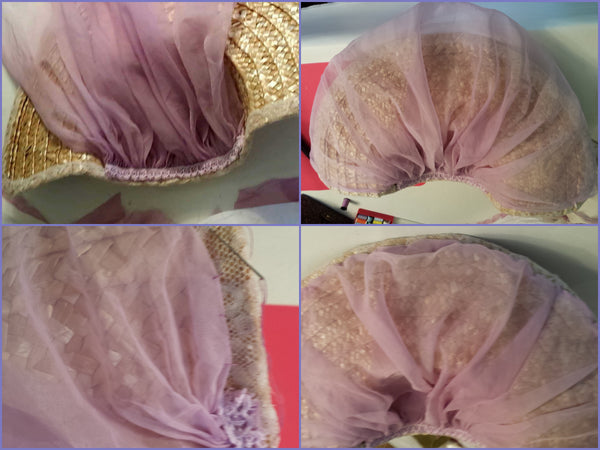
Lining your bonnet is optional but really adds a lot and is well worth the effort. I used a chiffon sleeve cut from one of Sarah's projects. It was conveniently gathered into a decorative narrow cuff, so opposite the tutorial's advice, I attached it at the bottom edge first. I then spread out the loose fabric, trimmed it, rolled the raw edge twice, and stitched it around the brim.
Next, I smoothed the upper portion a bit more taut, made a few stitches along the interior edge of the crown to secure it (these steps not shown, sorry), and stuffed the excess into the crown.
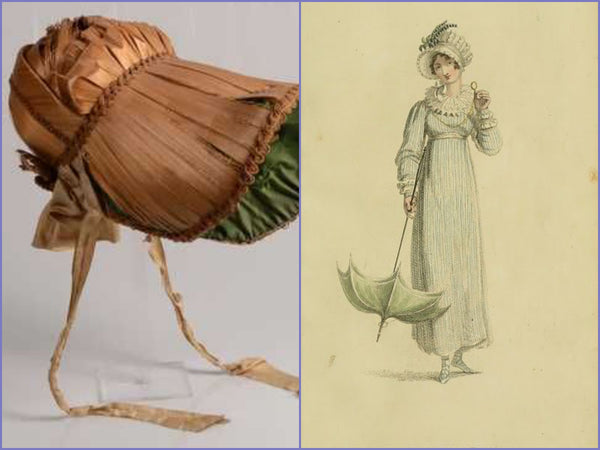
Next came the "tea cozy" poof. Here are original and fashion-plate examples:
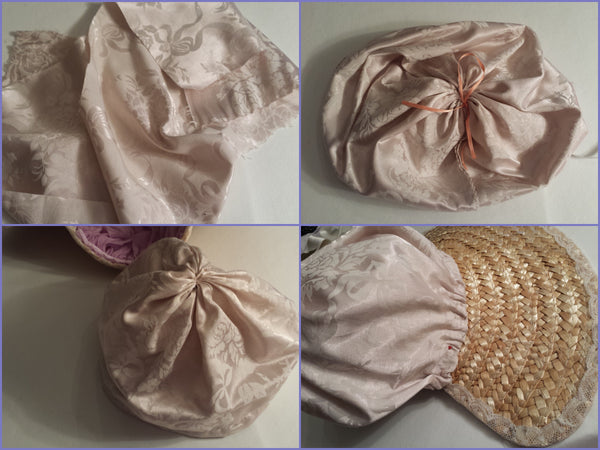
I used more of Sarah's prime cast-offs -- silk damask from a thrifted dress. I neglected to take photos of this crucial part, so please refer to the video tutorial if in doubt. It's not at all difficult, but a bit hard to explain.
You'll need a rectangular piece of fabric that when folded in half along the long edge is about 9" high. After you've sewn the short ends together to create a cylinder, it should fit over the crown of your hat with, at minimum, enough extra room to contain your hair.
Sew from the open end up toward the fold, leaving a little gap open at the top, into which you'll slip any slim ribbon or cord (it won't show). Tighten this drawstring completely so there's no opening at all, then flip your creation right side out.
Slip it over the crown of the hat and gather to fit, as shown. How dramatically poofy you want this element to be is up to you. Both sleek and extra-big are period-correct.
What probably isn't period-correct is the channeled elastic I added when I got fed up trying to gather it evenly around the crown. Feel free to send the historical-accuracy police, by horse and buggy.
Oops, error #1, I had to snip my stitches at the bottom inch or two at either side, loosen the elastic, and spread the fabric flat to widen the open space at back. Only then did it fit my head and accommodate my big bun.
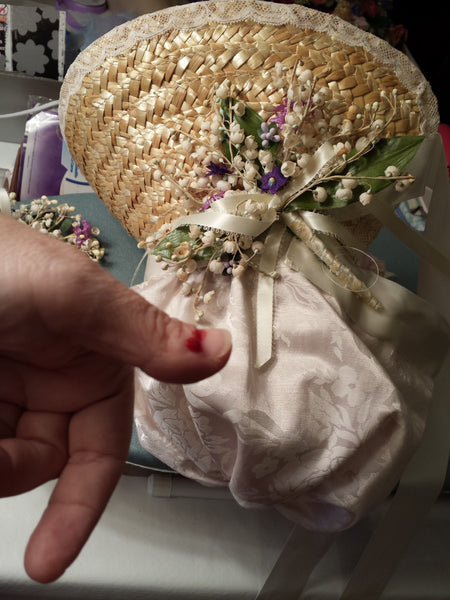
We found that tacking poof to bonnet with a stitch or two at the crown kept it from flopping about.
Cover the join with a ribbon or coordinating fabric. Add long ribbon ties** to the sides. This was error #2 for me, as my original placement choked me a bit and didn't narrow the bonnet properly around my face.
Also, to help with shaping, you might want to mist your bonnet with water and clip it into a more-narrow shape, but don't make my mistake #3 and fold it too near the top or you'll wind up with a pointed brim.
Time for the fun part, trim! Ladies back when regularly updated their hat trimmings to coordinate with a new dress, the season, or current fashion. Regency bonnets featured millinery flowers, dramatic feathers, and even faux fruit.
I found a box of very vintage floral trim at an antiques shop. For $1 I got two complete sprays plus additional bits and pieces. I removed, ironed, and replaced the rumpled ribbons, repaired or removed damaged parts, and added a few purple and mauve flowers to better coordinate with my dress.
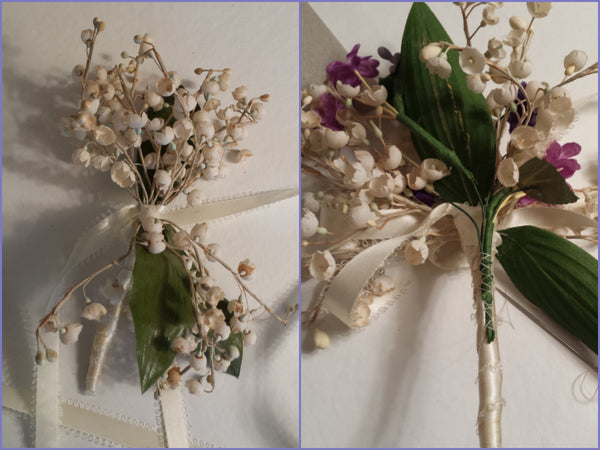
I attached the upgraded sprays, and that was that! I wanted to add a bit of trim along the inside edge of the brim (Sarah used some on her bonnet and it looks great), but I ran out of time before the event so it had to wait.
All told, I probably spent more than 10 hours on my bonnet, although I really enjoyed it and was not watching the clock. Sarah and I were both pleased with our results.
Friend and fellow Atlanta Time Travelers group member Steve joined us for the picnic. We had a wonderful time. Here are some photos.


See more photos of this and other dress-up adventures on the BDV Instagram Feed and Facebook Page.

* Thanks to tutorial creator Stephanie Johanesen for responding to my random FB message in such a friendly and enthusiastic manner.
** Note the spot of blood on the ribbon tie, resulting from one of many self-stabbings along the way. I needed a transfusion by the time I'd finished. Not really, but I do recommend starting with a thinner, finer straw or fabric hat, or being more adroit with needle and thread than I.

Comments
Perfect!
Liza, what a fabulous blog and your hat, as well as Sarah’s, is lovely! I have seen you dressed in several fashions from other times, but I have to say that you wear the Regency period with such elegance…..you girls are just stunning! I love hat making and millinery and in my next life, I think that’s what I’ll do! Thanks ever so much for sharing!
Helpful blog for vintage bloggers.This is such a stunning dress
You’re welcome! Turned out adorable.
Thanks for the reference materials! I’m looking at repurposing straw and other materials from placemats and linen or damask napkins to produce Edwardian and Victorian bonnets. Will let you know how it goes… so far they look more like nurse hats. I just have to bite the bullet and take the plunge and cut. I was on the right track with a wound organza bonnet and just need to plunge in. How besides hot glue do you suggest attaching plumage? I was thinking small grommets so that decor could be easily changed.
Hi Mimi and thanks for your comment. I don’t use hot glue, although it’s certainly a reasonable approach for those who can’t or don’t want to sew. I stitch everything — mostly by hand and sometimes by machine. I attach feathers by poking the needle through the widest point of the plume-free tip, taking several stitches there to anchor it, then working up the plume until it feels secure, taking care to keep it invisible. It’s easy enough to snip the embellishments off and replace with something else down the road.