Repairing a Victorian Bonnet
I recently bought this antique drawn bonnet on Etsy. “Drawn” means its exterior fabric is gathered, or “drawn together,” over a series of wires or other supports.
I knew it was in rough shape, but the price was within reach, the sellers friendly, and you know I love rescuing old clothes. I imagined I could wear it a few times before it permanently expires.
Once again, I forgot to take “before” photos. (Seriously, what is my problem?) Heather & Amelia graciously granted permission to use their listing photos, which I’ve combined for you here:

First, I had to do something about the edge of the brim. It was essentially naked. And things would only get worse. This triage maneuver served to tidy things up and to prevent further immediate damage:

Once that was done, I thought about adding a lace or tulle frill inside the brim, as was the style. But I quickly realized that the sheer lining I’d be attaching it to was in worse shape than the brim had been. Pieces kept falling off. I said “Sorry” and tore it out:

Look at that block-printed cotton! And, as is so often the case, it’s in great condition. Cotton is really the most miraculous fabric. Go ahead, sing the jingle. Also, you can see clearly in the above photo that I’d already created a lining at the back of the interior, using black cotton chintz from my stash. Whatever had been there was gone, leaving only exposed buckram.
As for the lost sheer lining, I thought I should try to replicate it. And, I just happened to have some cream silk organza. Here’s the process of making and installing the new “top lining” (I’ve no idea what this second lining layer is actually called):

And here’s the result. Doesn’t look like much, but it’s close to what was there originally, and it looks nice on:

Before I began working on this bonnet, I was rehabilitating another antique hat, whose dry-rotted silk ties snapped off the first time I tied them. Somewhere along the way I’d bought a length of wide, black, antique silk ribbon, which was waiting in my favorite storage box, the one labeled “Good Trim.”
I cut the length in half. I hemmed and then pleated one end of each to match the width of the originals, then cut the other ends at an angle. I stitched the ties onto that other hat, only to discover that it looked goofy. I preferred it without any ties at all.
This was good, as I had no more suitable ribbon. I removed the ties from the first hat and attached them to the bonnet, instead. Here’s the result:

This view of the back shows that something will eventually have to be done. I just don’t have the wherewithal to do it right now. I don’t think I have black silk taffeta, either. If you do, feel free to send some:

Here are views of the completed project. Cracked Betty’s big 40s hair doesn’t allow the lower edges of the bonnet to sit properly. They actually curve inward beneath the chin. But that’s okay. You get the idea. Eventually I’ll wear it and you can see it in action:

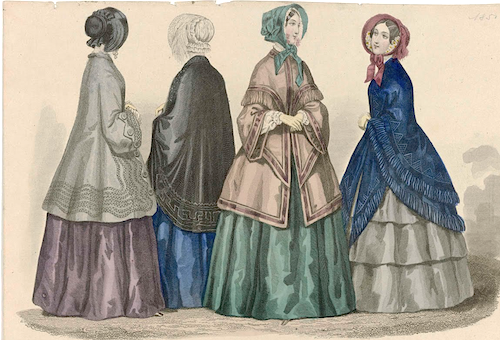
A whole lot of fashion plates, museum-collection descriptions, and research into the changing shape and construction of Victorian bonnets later, and I can semi-comfortably date this bonnet to the late 1840s to early 1850s, based on shape, size, silhouette, and embellishments. Old hat, hehe.
