More Regency Regalia: Cobbling a Costume for a Jane Austen Event
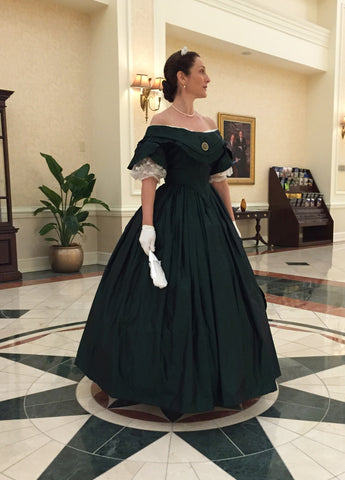
When my mom said she'd make me a mid-Victorian ball gown, I bought a lot of fabric -- 20 yards of changeable silk taffeta in hunter green/black. Here's her handiwork (thanks, mom):
I had plenty left over. When a winter Regency event came up, I had my favorite seamstress make me a 1797 dress from period-correct Nehelenia patterns. In trade for Beth's labor I shipped her nearly a dozen yards -- enough for my dress and at least another -- keeping only a scant yard for future repairs or projects.
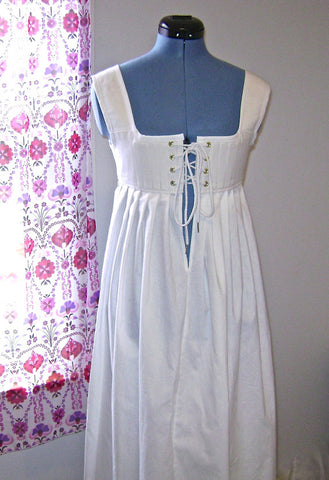
Once I had my gown, and a bodiced petticoat (corset plus slip in one, also from Beth) to go underneath, I set about completing the outfit.
First up, some antique (I mean really old) pins to hold my dress closed. These aren't sewing pins. They're what people used to secure their clothes, even before buttons. The friendly, metal-detecting Dutch eBay seller sent them in "as dug" condition, but they polished up nicely with a whole lot of Brasso and elbow grease. I was surprised at how extremely sharp they are! The modern sewing pins at lower right are for comparison:

Next up, a purse. Below are before and after shots of a reticule I'd bought on clearance. I replaced its original tassel with a beefier one, replaced its ribbon ties with satin cord I'd braided to be more decorative and substantial, and stitched on some fancy ribbon from the local crafts store. But first I'd flipped it inside-out, so the cord openings were inside. I also stitched together and hid the cord joins. I just prefer it that way.

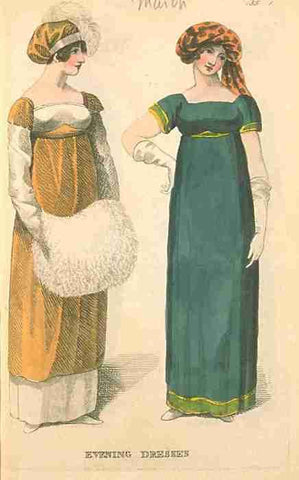
Next, a hat. I'd already made a Regency bonnet, but that wouldn't work for a formal, indoor, cold-weather event. Perhaps a stylish turban? I did research, and went to the local bead shop for aigrette supplies -- glass beads, head pins, spacers, a cone-shaped metal doo-dad to hold everything. I already had ostrich plumes. I thought I'd wind up with something like this:

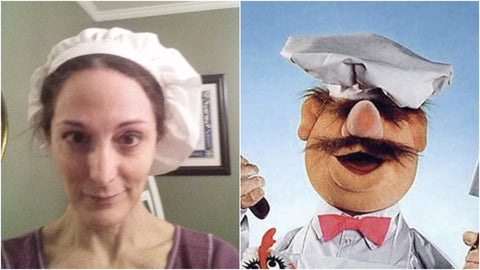
But with the clock ticking, and spooked by intimidating turban tutorials, I opted for a tam. It's basically a banded beret and seemed less complicated. An example, at left:
The tam tutorial recommended creating a muslin. It's not something I'd normally do (impatient), but with no spare silk or experience, I heeded their advice.
All I had to do was cut and gather a circle of fabric and attach that to a band, then embellish. They said to begin with a 20" diameter circle, so I did.
I looked up how to cut a circle (I'm a novice, I have to look up everything). Easy cheesy.
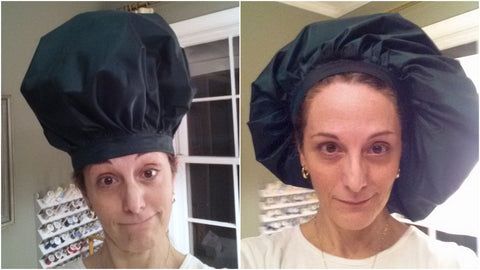
The resulting test tam was comfy and made me feel like a muppet. I took to wearing it around the house, muttering fake Swedish. Hurdy gurdy, bork bork bork.
Much bigger, I decided. You can always reduce, but you can't increase, and I had no fabric for a do-over. So I cut a 28" diameter circle.
The photo below shows the basting stitches for gathering the circle into a poof and that poof attached to the band with machine hemstitch. The band is a simple tube pressed flat. I made it a bit narrower than the muslin's band, starting with about a 3" wide strip. To determine the length of the band, I'd put my hair up (it's thick enough to change my hat size), measured around my head where I wanted the hat to sit, and then added several inches.
The black petersham ribbon I'd ordered to cover the raw interior edge never showed up (still lost in transit), so mom offered a length of mystery binding. I attached that, and the rest of the trim, by hand.

Here's the finished tam before adding any decorations. Hehe. Silly.
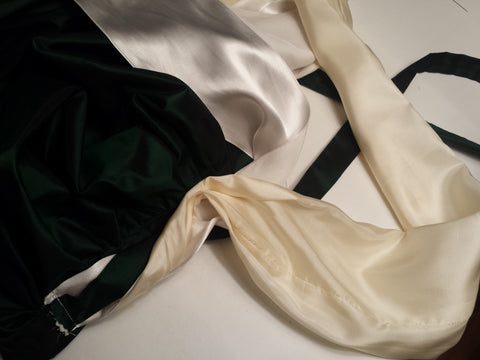
Next up, decorating. I sewed together at one end another flattened tube of the green silk plus two additional lengths of coordinating stash fabric. After loosely twisting them, pinning as I went, I tacked it all in place.
My kids voted to have the long tails remain hanging down. To me it looked a bit too Rembrandt/renaissance poet, and I couldn't work out a way to finish the fraying tail ends.
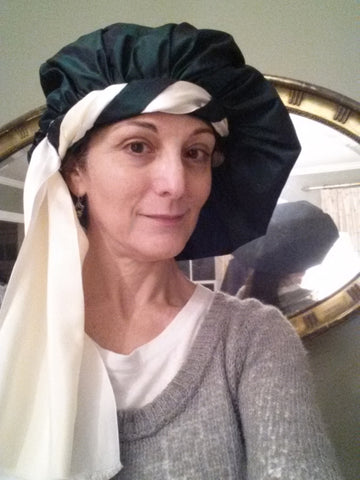
So off they came. I threaded a length of faux pearls through it all and tacked that on with a few more stitches. Here's the tidy interior and the completed, tail-less twist:

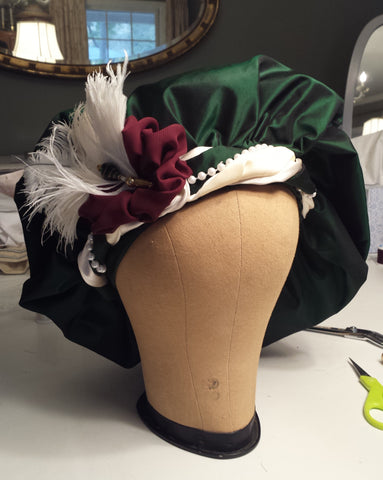
I made the aigrette as planned, but oops, no big white plume on hand, so I joined a few feather tops for a subtler approach. Finally, I watched several "how to make fabric flowers" tutorials, and created a simple, gathered blossom from burgundy chiffon. This embellishment covers the join where the pearl-and-fabric twist ends. Here's the completed tam:
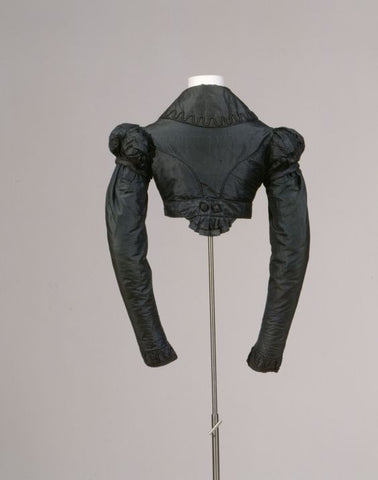
Last up is what I call my "faux Spencer." Faux, because the back seams are all wrong. To be period-correct, it should look like these original examples. Nowadays, a regular, set-in shoulder seam rests right where your arm meets your body. But from about 1790 to 1820, this seam sat over the shoulder blade. Very strange.
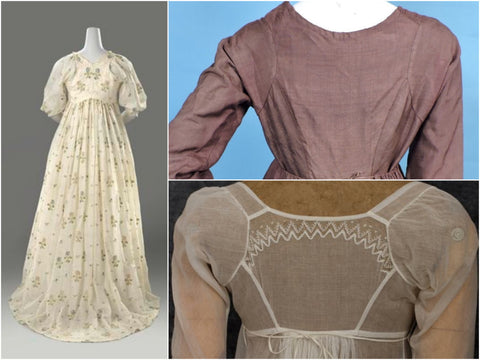
Fact is, period-correct construction, especially seams, changes how a garment feels, fits, and moves. Along with proper undergarments, and era-appropriate fabrics and fasteners, it's what makes a costume look like the real thing.
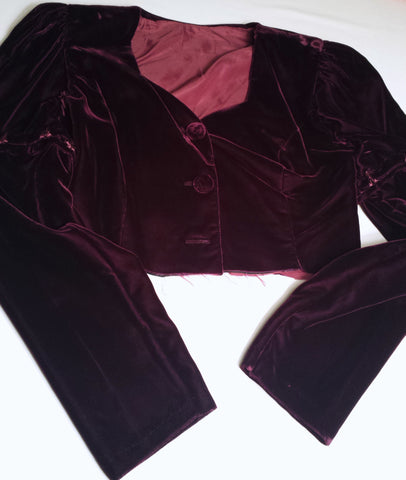
Alas, this verisimilitude is tough to achieve with only limited sewing skills and an epic, thrifted 1980s church-lady velvet suit. Wowza. Ain't that something?

When I realized I'd forgotten to take a "before" photo, I temporarily reconstructed. I'd already cut off the jacket's peplum and sleeve lace, removed monumental shoulder pads (not shown) and the two (gorgeous) rhinestone buttons that remained. I never got a photo of the skirt -- straight, below-knee, with bottom third in the dramatic, pointed lace. Quite the suit! But nicely made of good-quality velvet.
I used skirt fabric to create long sleeves, leaving a smidge of lace showing at the lower edge of the new "puffs." The jacket's sleeves weren't very full to begin with and my arms aren't slim, so the puffs underwhelm. Perhaps taking in the too-loose lower sleeve at some later date will create a comparatively puffier puff.
I used more skirt fabric to make covered buttons and the shortened jacket's "belt" which I pinned in place before making the final cut to the jacket body, just in case. I then hand stitched the belt onto the jacket, from the inside, top and bottom, everywhere but at the center back.

After trimming off the folded-up hem and securing it in place, I created a smaller, ruffly new peplum from pieces of the old. Oddly enough, that was the hardest, most time-consuming piece to place. Possibly because it was now 2:30am. Here's the result:

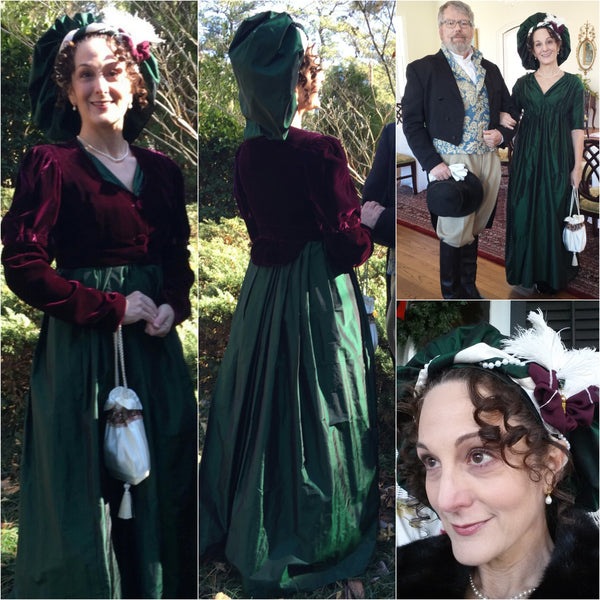
And here's how the whole thing looked at the event the next day. I went with Steve, my friend and fellow member of Atlanta Time Travelers: Vintage and Historic Clothing Enthusiasts group:
If you're interested in learning how to create a reasonably historically accurate Regency hairstyle, click here.

I've already moved on to the next project, but when I trim down the sleeves, I'll add a few covered buttons above the ruffle peplum, as in this gorgeous original:

Comments
It came out beautifully!!!
“…limited sewing skills…”? Oh, no, not true at all. I am so impressed with what you made and how wonderfully the completed costume suits you. The tam is especially delightful—and my husband and I burst out laughing at the “hurdy gurdy, bork bork bork.” Congratulations on your great talent and your humor.
What a lovely outfit! Great job!
btw, I found your blog from your LinkedIn post. :-)
The final outfit came out so nicely! I’m glad I could help out with the gown and reticule! :) My favorite part of the outfit is the turban but I have to say, the spencer is coming in a near second! That’s a very impressive alteration job you did!
Your solution to the Spencer was very clever. The entire outfit looks great!
You kooky, clever woman! Love how you tackle these period costume pieces – with skill and wit. The results are fab. Brava!
Thank you all for your kind comments!
Thank you so much for sharing this. I’m about to pick up needle and thread for the first time in over 20 years to make a beret. The sources and images are really valuable, and I feel more confident and prepared.