Quick & Easy Regency Hairstyle Tutorial
This worked well on my long, very thick hair.

Preheat a small-diameter curling iron.
1. Color grays (oops, forgot this step).
2. Make center part.
3. Make shallow parts from center to front of each ear. Clip out of the way.
4. Comb the rest back.
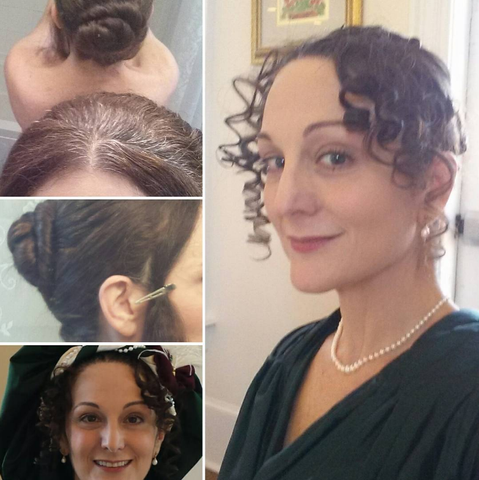
5. Gather top half into pony at center back of head, secure, twist into bun, pin in place.
6. Gather remainder, twisting upward and around existing bun, pin in place*.
- note that I usually use an old-fashioned hairnet (the invisible sort) to cover the bun and that I do the bun in two parts to distribute the hair's weight a bit. -
7. Unclip one side of front.
8. Take a small section (I made about 5 sections per side), curl lower half.
9. Loop uncurled length back on itself against your head and pin flat, leaving curl dangling on your forehead at desired length. Gather up and temporarily clip the hot curl.
10. Repeat until entire front is curled, pinned to head to shorten, and curls clipped to cool.
11. Spray with hairspray. Not too much.
12. Unclip fully cooled curls (don’t lose patience and unclip too soon or your curls will drop).
13. Use gray-covering stuff where needed and applicable. Ugh.
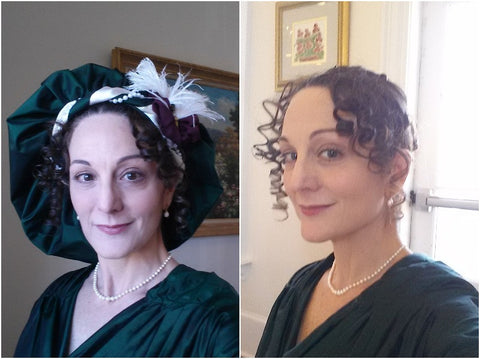
14. Put on your crazy hat! (Don’t have one? Learn to make one, here.)
 With and without my Regency Tam (aka Crazy Hat)

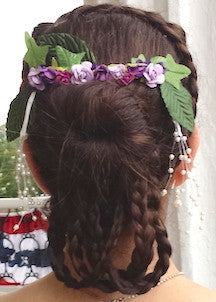
Hairstyle I wore to a mid-Victorian ball. Lots o' braids.

